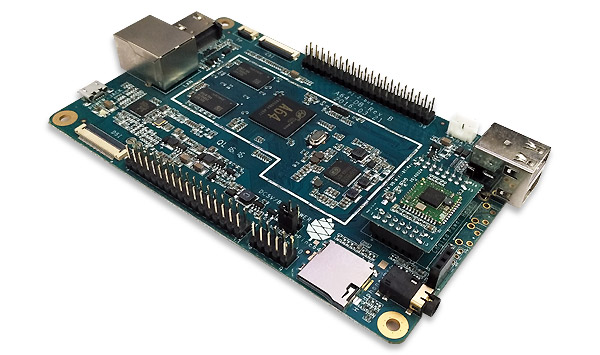
I often work with the Yocto Project to build custom Linux distributions for a various range of products. One of the main struggles you can have while working with this tool is managing multiple git repositories in order to produce a successful build. A new tool called kas tries to simplify this process; let's see how by building a distribution for a Pine64 board.
Installation
First, we must install python3 and pip, together with some other dependencies:
$ sudo apt install python3 python3-pip
$ pip3 install distro jsonschema PyYAML
Then install kas; I had a problem with a dependency so I had to install another package by hand
$ pip3 install testresources
$ pip3 install kas
Running a simple build
As an example, we can try to build a simple image for the qemu machine which is already contained in the poky repository. We need to create a special file, kas-project.yml, which will describe how our distribution must be built and which layers must be included; we will use the file provided by the kas documentation, with some small tweaks. Create a folder for the project:
$ mkdir kas-pine64
$ touch kas-project.yml
Add the following snippet to the project configuration file:
header:
   version: 11
machine: qemux86-64
distro: poky
target: core-image-minimal
repos:
   kas-pine64:
   poky:
   url: "https://git.yoctoproject.org/git/poky"
   refspec: hardknott
   layers:
   meta:
   meta-poky:
   meta-yocto-bsp:
local_conf_header:
   kas-pine64: |
   EXTRA_IMAGE_FEATURES += "debug-tweaks"
The kas-project.yml file is written in YAML, a minimal markup language often
used for configuration files. It allows us to describe our distribution in a very clear way; in this example we will be
building the core-image-minimal image based on the poky distribution for a qemux86-64 machine. The layer used are
the ones contained in the poky layer, listed in the configuration file. The local_conf_header section allows
us to add any line to the local.conf file in the build folder.
We can now use one of the available kas commands, build:
$ kas build kas-project.yml
kas will clone the repositories indicated in out project file (just poky in this case) and start the build process
using bitbake for the distro and machine we set; at the end of the build process we will have a build
folder with the same structure of any Yocto project build.
Other kas commands
One other useful kas command is shell. We can run it like
$ kas shell kas-project.yml
and what it does is it opens a new shell instance with the build environment loaded. We can also provide a custom command to execute inside the new shell; for example to replicate the previous build command, we could run:
$ kas shell kas-project.yml -c "bitbake core-image-minimal"
Since we are running through the basic Yocto demo, we can now try to load the virtual QEMU image:
$ kas shell kas-project.yml
$ runqemu qemux86-64 core-image-minimal nographic
It will prompt for the admin password to create the tap interfaces, then, after the boot sequence, we can login with
"root" (since we enabled debug-tweaks in the project file). I also tried graphic mode but for some reason the
GUI never appears, maybe for some restrictions coming from the kas environment.
Integrating with more layers

Now let's add some more layers to build an image for a real board, the Pine A64. Under the "repos" section of the configuration file, add the following lines:
   meta-openembedded:
     url: "https://github.com/openembedded/meta-openembedded.git"
     refspec: hardknott
     layers:
       meta-oe:
   meta-sunxi:
     url: "https://github.com/linux-sunxi/meta-sunxi.git"
     refspec: hardknott
We can add also one custom layer; it could be fetched from a private git repository, but it can be a simple folder in the project structure as well:
$ mkdir meta-custom-pine64
Create also a meta-custom-pine64/conf/layer.conf file for our custom layer:
# We have a conf and classes directory, add to BBPATH
BBPATH .= ":${LAYERDIR}"

# We have recipes-* directories, add to BBFILES
BBFILES += "${LAYERDIR}/recipes-*/*/*.bb \
            ${LAYERDIR}/recipes-*/*/*.bbappend"

BBFILE_COLLECTIONS += "meta-custom-pine64"
BBFILE_PATTERN_meta-custom-pine64 = "^${LAYERDIR}/"
BBFILE_PRIORITY_meta-custom-pine64 = "10"

LAYERDEPENDS_meta-custom-pine64 = ""
LAYERSERIES_COMPAT_meta-custom-pine64 = "hardknott"
We can then add a new custom image creating the meta-custom-pine64/recipes-images/images/kas-custom-image.bb recipe:
SUMMARY = "kas custom image"
LICENSE = "MIT"

inherit core-image

IMAGE_FEATURES += "ssh-server-openssh"
Set the image as the build target by changing it in the project configuration file, and add the new layers as well; the
machine can be set to pine64-plus:
...
machine: pine64-plus
distro: poky
target: kas-custom-image
...
# Add the new layer in our project section
repos:
  kas-pine64:
    layers:
      meta-custom-pine64:
The build process can be run again with:
$ kas build kas-project.yml
# Once the build process ends, we can flash the image
$ cd build/tmp/deploy/images/pine64-plus/
$ sudo dd if=kas-custom-image-pine64-plus.sunxi-sdimg of=/dev/sd<X> bs=1024 status=progress
If we boot the board using the flashed SD image, we will have a system with a basic image and an ssh server; this can work as a canvas for more structured projects.
A small note: at the time of writing there is an issue with U-Boot in meta-sunxi for the pine64-plus machine; I opened a pull request to fix that; apply that patch if you want to try to build the project.
